Pages

Showing posts with label Baking. Show all posts

Monday, March 11, 2013

Pinterest Faves: Week of 3/3/13 - 3/9/13


I am obsessed with this bathing suit. I think I have to splurge and get this for my summer in Newport this year!


'Penelope' Crochet Overlay One Piece Swimsuit


I found this pin but it did not lead my to a website. Luckily the directions are simple - put any fabric you choose under a glass frame and use as a tray in your home. This would be really cute on a dresser or bathroom counter!
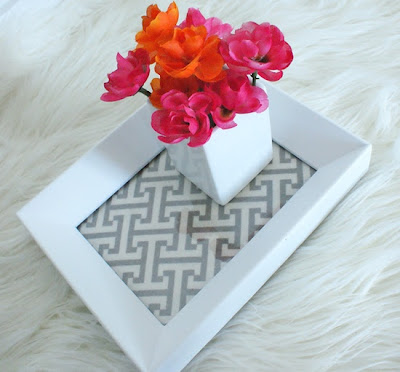


Picture frame turned into a tray


The Copley collection from Hearts On Fire is quickly becoming my favorite and these pave pendants would look great day or night! The hardest part is choosing white gold, yellow gold, or rose. How about all three layered on different length chains?


With St. Patrick's Day coming up this weekend I have been looking for a good cookie recipe to bring to a party my friends are throwing. Here's to wishful thinking that my cookies will look anywhere near as good as these...


Shamrock Cookies


Sticking with the St. Patrick's theme for the end of this post how about a White Russian turned green? This recipe calls for mint extract but you could make it without and just add green food coloring for a perfectly festive drink!


Green Russian


Let the Shenanigan's begin!


I <3 Shenanigan's Tee-Shirt

Tuesday, March 5, 2013

Pinterest Faves: Week of 2/24/13 - 3/2/13


March 1st means time to take down the winter decorations and get ready for spring. I want to get some white hydrangeas and keep them in a mason jar on my coffee table. Maybe paint the jar grey/silver?


Hydrangeas in distressed mason jars


My sister had a great geo patterned cardigan from Urban Outfitters that they no longer sell :( This is the closest thing I've been able to find to it yet...


SheInside Geo Tribal Pattern Open Cardigan


I don't know which of these pretzel bite recipes I want to try to make first?? 


Pretzel Bites - 3 ways


These quinoa patties are easy to make and you can use whatever you have on hand to flavor them. If you make a big batch of the mix just keep it in a bowl in the fridge. Form patties to cook as needed throughout the week.

These would be great over a salad for lunch as well!


Quinoa Patties


This pin was kind of a dud because it didn't lead me to the website it was originally from. Luckily it had the recipe in the description.

I have everything I need to make these already in the house - love when that happens!!


Pre-heat your oven to 375 F. Open the crescent rolls according to package direction. 

Spread melted butter on rolls and sprinkle with cinnamon and sugar. Roll up the crescents and bake at 375 F for 11-13 mins. 

While the crescents are cooking mix 1 1/3 cup of powdered sugar with 2 tablespoons of milk. Spoon the icing over the crescents as soon as they come out of the oven and still hot.


Tuesday, February 19, 2013

Pinterest Faves: Week of 2/10/13 - 2/16/13


 I've been on a cookie kick lately and these might just be the next ones I bake:


Raspberry Thumbprints


I want this whole set for my kitchen:


Wooden Cooks Tools


This is actually a really easy way to make your nails look really cool!


Gradient Nails


Is it spring yet?


I found my next DIY project:


Tuesday, February 12, 2013

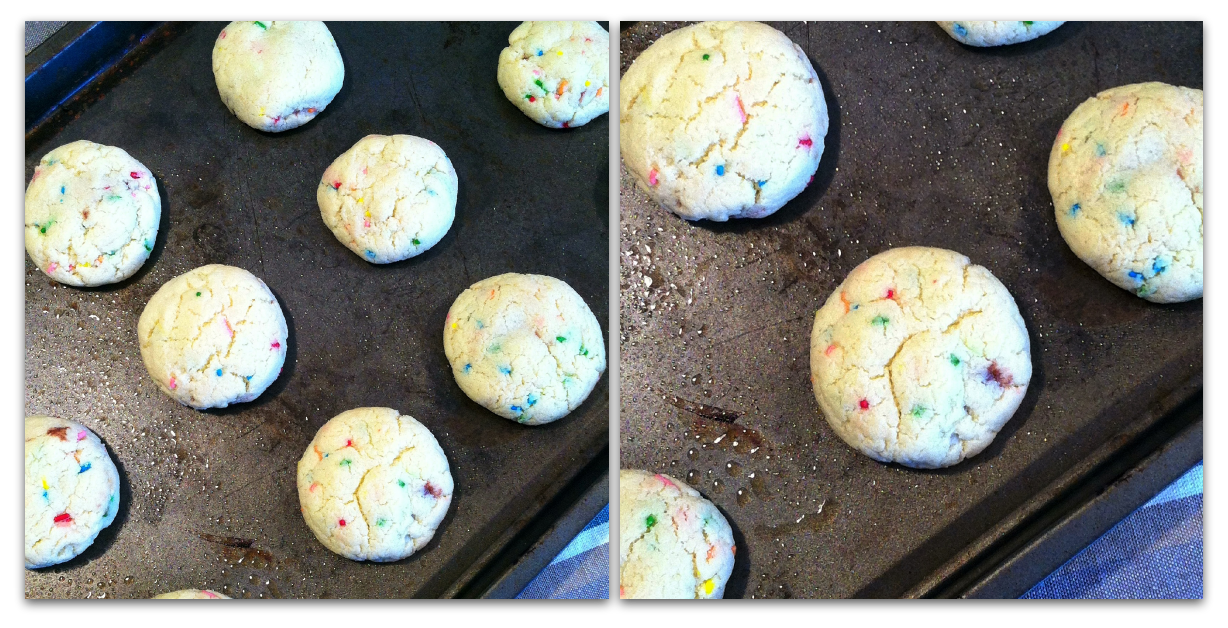
Nutella Stuffed Funfetti Cookies


We got 20+ inches of snow this weekend...


...so this happened.


If you love Funfetti cake I think you will be obsessed with the cookies! 

Sometimes the recipe is on the box but not always. If it's not on yours just go here. That is the original Funfetti cookie recipe that I normally top with Funfetti frosting and sprinkles.


However,


I found this recipe on Pinterest and knew I had to try it out. They were really easy to make and I've included some tips on what I will do next time to make sure they are 100% perfect. The greatest thing about this recipe? You could really make any kind of cookie and put the Nutella filling in them and they would be delicious!


WHAT YOU WILL NEED:

  • 1 box of Pillsbury Funfetti cake mix
  • 2 eggs
  • 1/3 cup vegetable oil
  • 1 teaspoon vanilla extract
  • Approximately 1/2 cup Nutella (about 1 teaspoon per cookie)


Line a cookie sheet with tin foil (or parchment paper). Scoop teaspoon size balls of Nutella onto the sheet. Freeze for about 20 minutes.


Next time I'm going to make my scoops a little smaller


When the 20 minutes is almost up pre-heat your oven to 350 F. Mix together the Funfetti mix, eggs, vegetable oil, and vanilla extract.


Remove the Nutella from the freezer. 

With your hands, roll a walnut sized ball of dough and place a frozen Nutella ball into the center. Roll the dough ball in your hands until it is smooth and no Nutella is exposed. 

Place on the cookie sheet.


I sprayed my cookie sheet with non-stick spray but you can also use parchment paper


Bake for 9-10 minutes, or until the edges are slightly golden. Cool on the cookie sheet for 2 minutes then transfer to a cooling rack.


They might look too soft when you pull the sheet from the oven but they are fully baked


Monday, February 11, 2013

Pinterest Faves: Week of 2/3/13 - 2/9/13


I can't find the original site these rings came from but I really want the little bird one!


Animal Rings


I love these because you can make them with whatever you have in the fridge. Serve them with these.


Spinach and Mushroom Egg Cups


Then serve this for dessert. #PerfectBrunchmenu


Raspberry Chocolate Coffee Cake


I want to do this project under my bathroom and kitchen sink.


Self-adhesive vinyl tile under used under sinks


Every summer we see Kenny Chesney play at Gillette Stadium. This year's countryfest tailgate is going to have to include these pre-made drinks in mason jars, chilled on ice.

Can't wait to drink one of these while tailgating next to this.


Wednesday, February 6, 2013

Brown Butter Oatmeal Chocolate Chunk Cookies


I've had this recipe pinned from How Sweet It Is for some time now. I pinned it so I  could try my hand at brown butter.

With the help of Jessica's step by step instructions browning the butter was an easy task and gave the cookies such a depth of flavor.

While I am usually a straight forward chocolate chip cookie lover, this recipe is definitely going to make it into the mix from now on!


Recipe adapted from How Sweet It Is
makes about 15-18 cookies

WHAT YOU WILL NEED:

  • 1/2 cup unsalted butter
  • 1/2 cup granulated sugar
  • 1/2 cup loosely packed brown sugar
  • 1 large egg
  • 2 teaspoons vanilla extract
  • 1 1/4 cup all-purpose flour
  • 3/4 cups rolled oats
  • 1/4 teaspoon salt
  • 1/2 teaspoon baking powder
  • 1 1/2 teaspoons cinnamon
  • 1 cup chocolate chunks

optional: 1- 2 tablespoons milk, if dough is crumbly

Preheat oven to 375 F.

First you need to brown your butter...
Heat a small saucepan over medium-low heat and add butter. Whisking constantly, cook butter for 5-6 minutes or until bubbly and small brown bits appear on the bottom of the pan. Keep your eye on the butter the entire time and immediately remove from the heat once you see the brown bits. Whisk for an additional 30 seconds once off the heat. Set aside and let cool completely. 
**The butter goes from a light yellow color to bubbly, then a clear brown but can burn quickly. Make sure you remove the pan from the heat as soon as you see it start to clear and the brown bits are forming at the bottom of the pan. (See How Sweet's step by step instructions with photos of the process)**

While the butter is cooling...

In a bowl, combine flour, salt, baking powder, oats and cinnamon. Set aside.
Once butter has cooled, add to a large bowl. Whisk in sugars until smooth. Whisk in egg and vanilla until smooth. 

Slowly stir in dry ingredients - mix gently with your hands if necessary.  If your dough is dry and crumbly add in milk, 1 tablespoon at a time. Fold in chocolate chips. Refrigerate dough for 30 minutes.
Form dough into 1 1/2 inch balls and place on a baking sheet lined with parchment paper and bake for 10-12 minutes, or until golden brown. 

You will notice these cookies don't spread out as much as regular chocolate chip cookies during baking. At first I thought they were taking longer to bake which was not the case. Make sure to keep your eye on them so they don't burn.


Friday, January 18, 2013

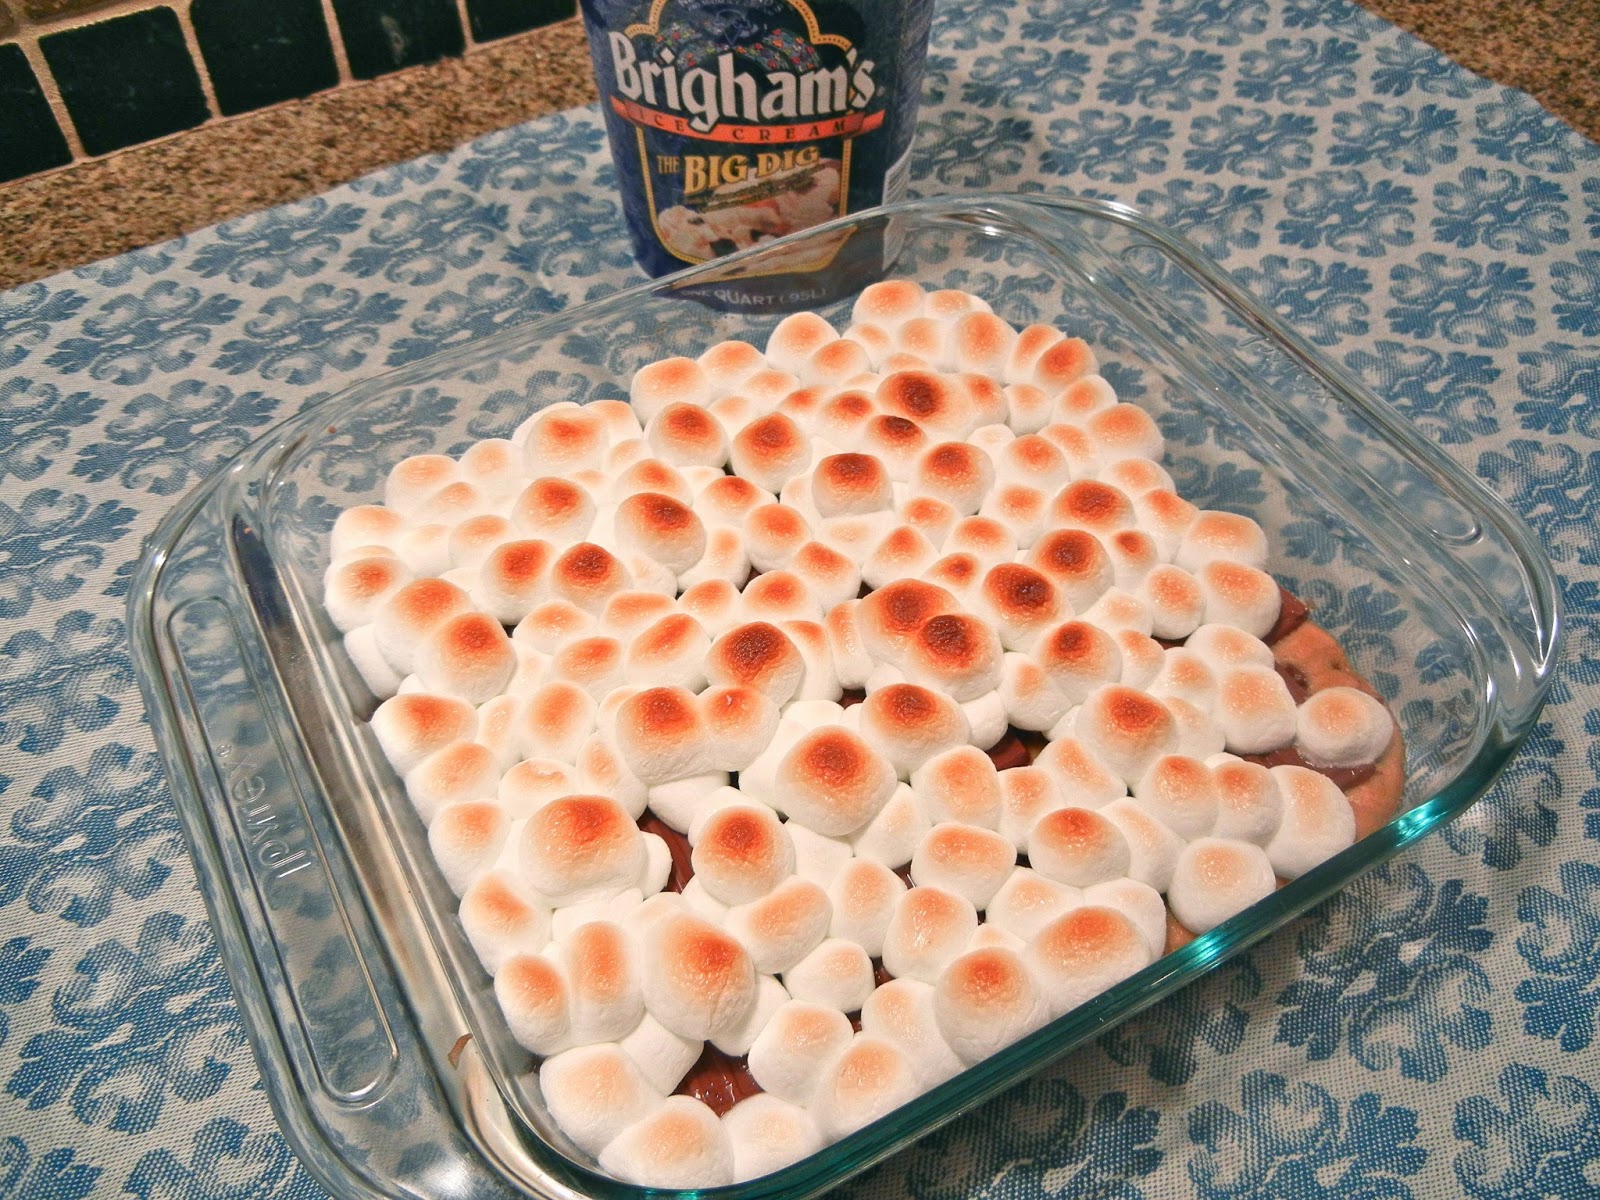
Chocolate Chip Cookie S'mores Bars


I found this pin on Pinterest and knew I had to make immediately! So as a treat for my roommate and my friend Jaime I whipped these up the other night!

First of all, they are BEYOND easy to make.

Second of all, they are DELICIOUS!

However, next time I make them I will use my own chocolate chip cookie dough I make from scratch :)


WHAT YOU WILL NEED:

  • Graham crackers
  • Chocolate chip cookie dough - either from scratch or buy the pre-made kind from the grocery store
  • Hershey's chocolate bars, broken into pieces
  • Mini marshmallows
  • Baking dish - I used an 8x8 size one and it was perfect!


Pre-heat your oven to 375 F (or whatever the cookie dough package says to bake them at).

Line the bottom of your baking dish with the graham crackers.


Spread the cookie dough over the graham crackers. Bake for 9-11 minutes (or however long the cookie dough package says), or until the cookie becomes golden brown.


Lay the Hershey's bars on top of the cookie.


Top with mini marshmallows and put back in the oven until the marshmallows become browned. I used the broiler for this step and just watched them closely - they can go from browned to burned in a bout 0.5 seconds!


We were too impatient to let them cool so we could cut them into nice bars but they were amazing all warm and melty. 

Serve with your favorite ice cream and prepare to be in heaven!


Tuesday, November 6, 2012

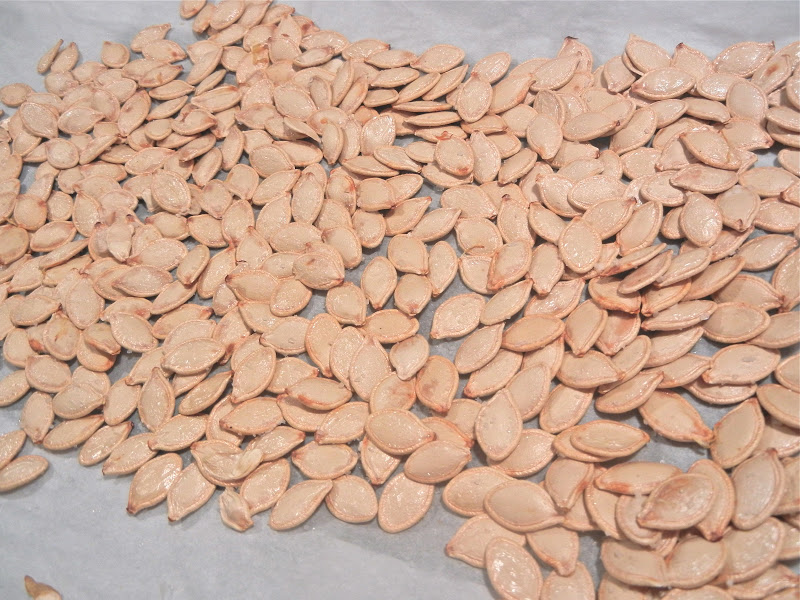
Toasted Pumpkin Seeds


Growing up, after carving pumpkins we always toasted the pumpkin seeds. So after making all of that pumpkin puree I had tons of seeds left over. They were the perfect snack!


WHAT YOU WILL NEED:

  • Seeds from one pumpkin
  • Parchment paper
  • Olive Oil
  • Sea Salt


Preheat your oven to 250 F.

Scoop out the seeds from your pumpkin into a strainer.

Separate the seeds from the pumpkin fibers and rinse well.

Lay out on cookie tray lined with parchment paper. Allow to dry overnight.

Once dry drizzle with olive oil and sprinkle with sea salt.

Bake for 1 hour and 15 minutes. Let cool for 10 minutes then eat - with the shell on or off!


Monday, November 5, 2012

Homemade Pumpkin Puree


This is the EASIEST thing to do!

You will have more pumpkin than you know what to do with. It is also so much less expensive than buying it canned at the store.


WHAT YOU WILL NEED:


  • 1 medium pumpkin
  • That's it!


Pre-heat your oven to 400 F.

Put the whole pumpkin on a baking sheet.

Roast for 45 minutes to 1 hour depending on the size of your pumpkin. You will know it's done when it is brown on the outside and fork tender.

Let cool then slice in half. Scoop out all the fibers and seeds (rinse and dry if you are going to bake after).

Scoop the pumpkin into a food processor and puree until smooth. Add a tiny bit of water if needed to help along.

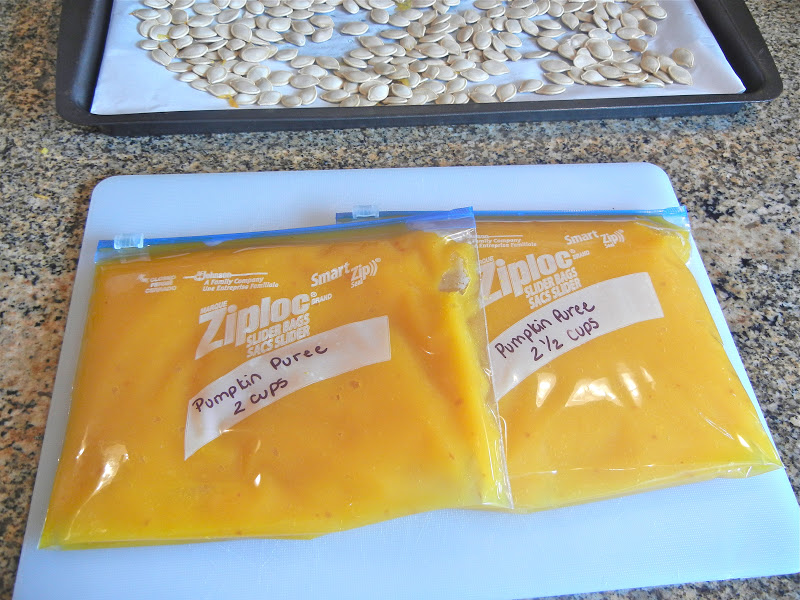
Store in freezer safe bags - I portioned mine out into about 2 cups so it will be easy to thaw and use.

**I was skeptical about putting the whole pumpkin in the oven but it worked perfectly! It makes it so much easier to cut in half after it's cooked rather than before.**

Thursday, August 16, 2012

Basil Salt


If you are like me you love to use fresh herbs but always have extra that goes bad pretty quickly.

After making my Skillet Baked Ziti I had some extra basil I didn't know what to do with. After doing some google research I decided to make Basil Salt.

It was so easy and now I have no wasted basil!


Place 1/2 cup of basil and 1/2 cup of sea salt in a small food processor.


Pulse until the basil is broken up and mixed throughout the salt.


Bake at 200 F for 60 minutes.


Your kitchen will smell fantastic.


Store in a small mason jar or airtight container.